Basic Settings
This section gives you a brief overview of the available Parameters of the NXD HyperionHub Module for Joomla! 4.x / 5.x.
Module Tab
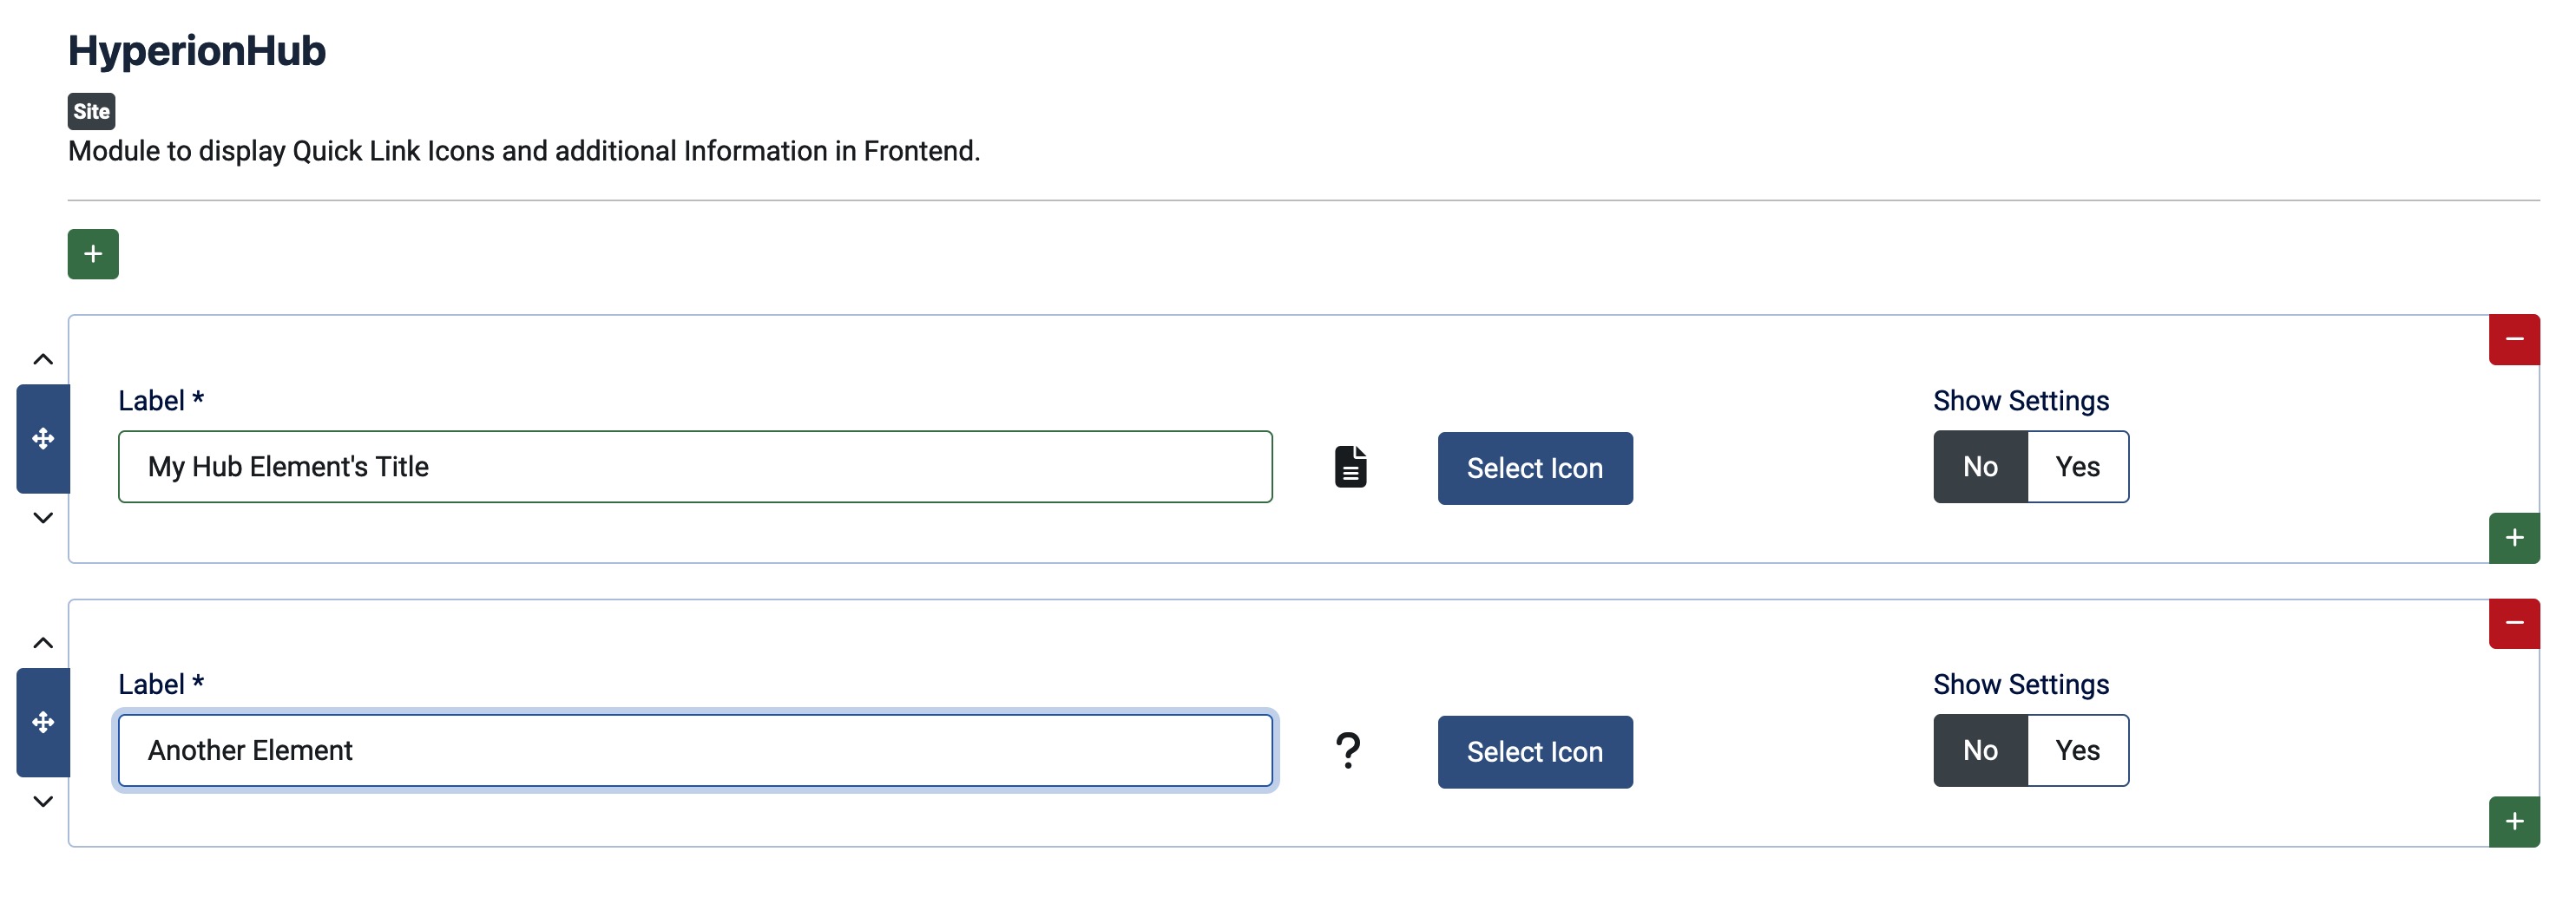
You can easily manage your elements in the “Modules” tab. Further options are available for each element if you set the “Show Settings” option to “Yes”. The following settings are available for each element:
Elements
Each Element defines a single Hub Item. You can add multiple Elements to the Module. Please note that the order of the Elements is important as it defines the order of the Items in the frontend. The amount of Elements you can add is limited in the Free Version. The Paid Version has no limitations.
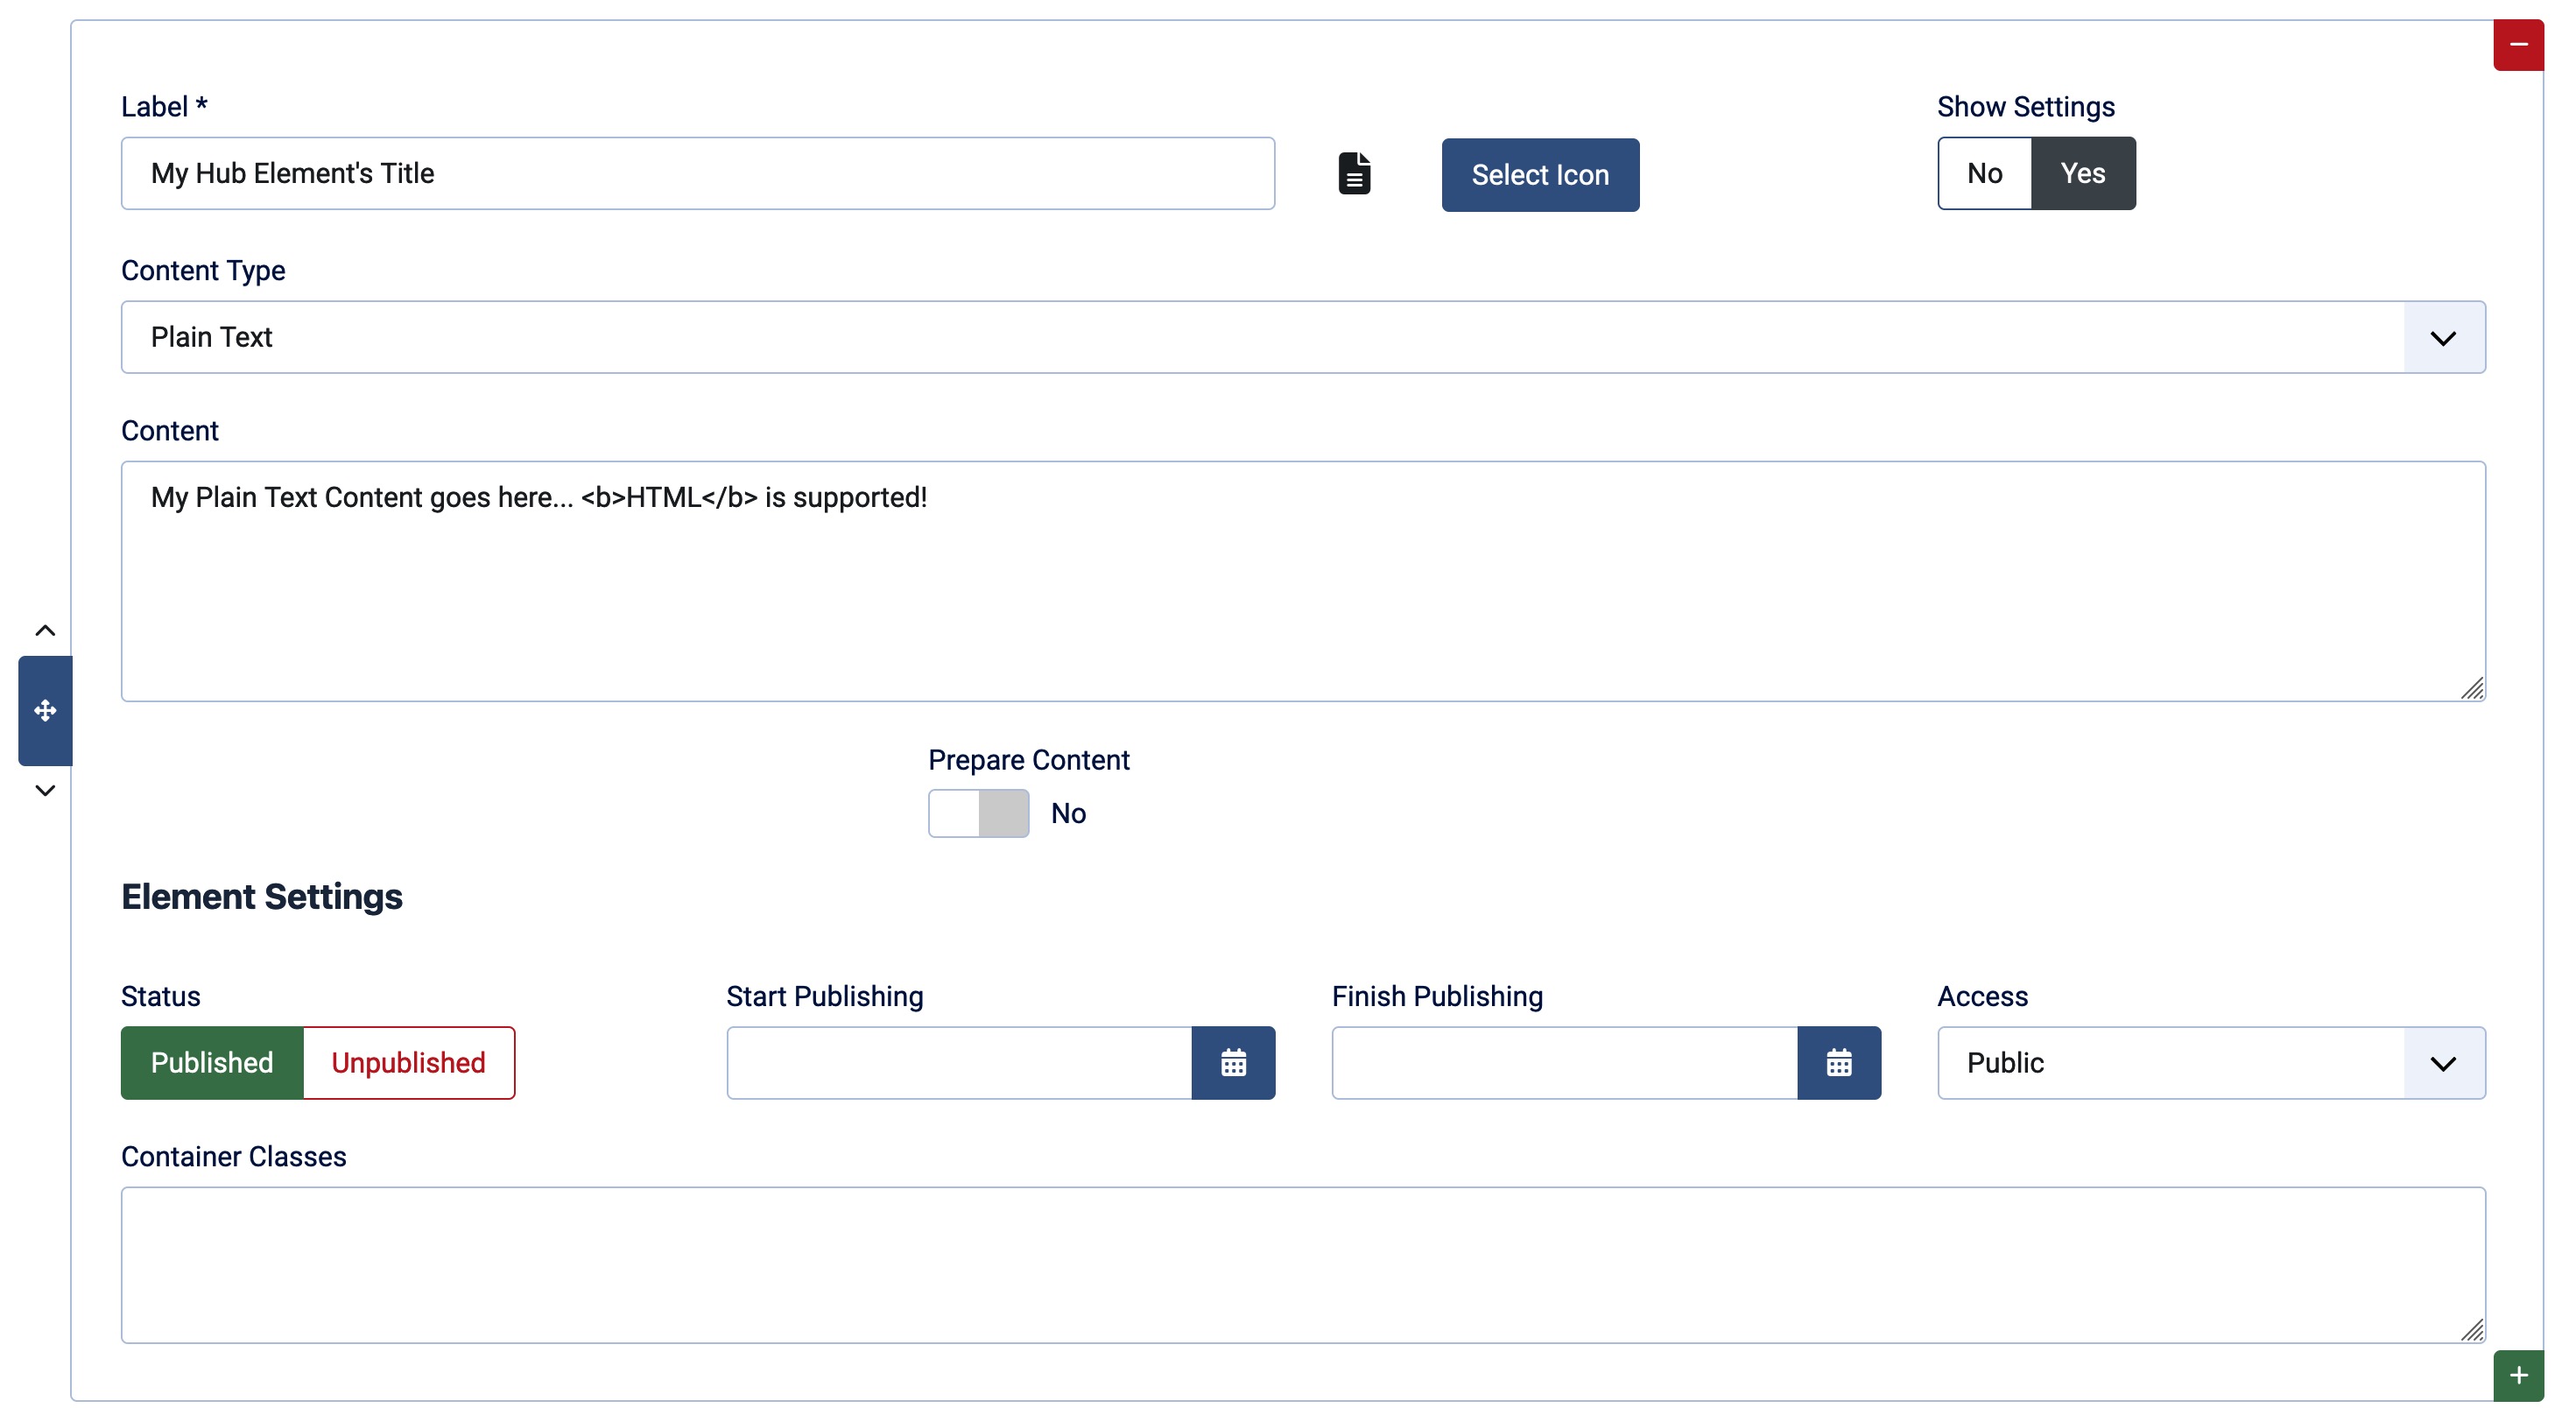
Label
The label of the element. Will be used as the title of the element and is shown in the frontend inside the element and as well as Tooltip.
Icon
The icon of the element. Will be shown in the frontend as Hub Item Icon. You can currently choose from over 1800 Icons from the Font Awesome 6 Library. The integrated Search makes it easy to find the right icon for your element.
Content Type
The type of the content. Currently, the following types are available:
- Plain Text: A simple text field where you can enter your content.
- Editor: A WYSIWYG Editor where you can enter your content.
- Article: Select an Article from your Joomla! Installation. Paid Only
- Module: Select a (Frontend) Module from your Joomla! Installation. Paid Only
- Link: A simple Link field where you can enter an internal or external URL.
- Anchor: A simple Anchor field where you can target an element on your page (needs to exist on the page so that it works).
The Article and Module Content Types are only available in the Paid Version.
There is currently an issue with the Editor Content Type when using TinyMCE (Joomla! Standard). After adding a new Element you may need to Save the module first otherwise the Editor might not be loaded. We recommend using JCE Editor instead.
Dependent Fields
Article
- Select Article: Select the Article you want to display.
Module
- Select Module: Select the Module you want to display.
Use Element Title
For the Article and Module Content Types you can choose to use the Title of the selected Article or Module as the Element Title.If enabled the Label will not be used in the frontend.
Prepare Content
For the Plain Text and Editor Content Types you can choose to prepare the content. If enabled the content will be processed by the Joomla! Content Plugins which can be useful for example if you want to use shortcodes in your content.
The Prepare Content option for Plain Text or Editor Content Types is only available in the Paid Version.
Element Settings
For the Article and Module Content Types the module will use the settings of the selected Article or Module for the Published, Start Publishing, Finish Publishing and Access settings. So these settings are only visible if you have selected the Plain Text, Editor, Link or Anchor Content Type. If you would like to define one of these settings for an Article or Module you can do this in the Article or Module itself.
The Element (Publishing) Settings are only available in the Paid Version.
Status
Set the status of the Element. If disabled the Element will not be shown in the frontend.
Start Publishing
Set the date and time when the Element should start to be published.
Finish Publishing
Set the date and time when the Element should stop to be published.
Access
Set the access level for the Element. If the access level of the Element is higher than the access level of the user the Element will not be shown in the frontend.
Container Classes
Here you can add additional CSS classes to the Element Container. This can be useful if you want to style the content of this specific Element differently. Multiple classes can be added separated by a space.
my-class my-other-usefull-class
If you want to add custom classes to each Element you can do this in the Classes Tab.